Turn to Wood when People become too Much
- Meagan Moody
- Sep 3, 2020
- 3 min read

This new way of life has me working from home for my 9 to 5, and on most days, I absolutely love it. I'm a workaholic, so it really allows me a much better work/life balance. So, there's not many complaints here on my side about the situation.
However, this does not mean that some days I just reach my limit of dealing with nonsense and grown men acting like children. The other day was definitely one of those days. So what did I do? Turned to wood. Wood, and well - POWER TOOLS!
There is just something about the sound of circular saw or an electric sander working it's magic on a piece of wood, that just releases a lot of stress and frustration for me. The glass of wine that accompanied me halfway through the project might have helped too. (By the way, if you like sweet red wines, I HIGHLY recommend Sweet Revenge from St. Julian Winery).
Okay, okay, okay - so just what project did I take to? A planter box. And it was the quickest and easiest project. Now before I dig into the 'How-to', let me just state, yes, this is a planter box for me. And yes, I DO NOT have a green thumb. I kill pretty much everything, so why would I bother building a planter box? Because recently I've had luck with one plant. It's stayed alive since March. So I've decided that I'm going to give it another shot, this time with purpose - to grow spinach. And yes, I know it's past growing season, so it's coming indoors. Using twine rope to hang the box from the curtain rod. Final picture on that to follow. I'm still letting it soak up whatever sun and heat is still left in the summer first.
You caught me chatty tonight. But here we are - the project.
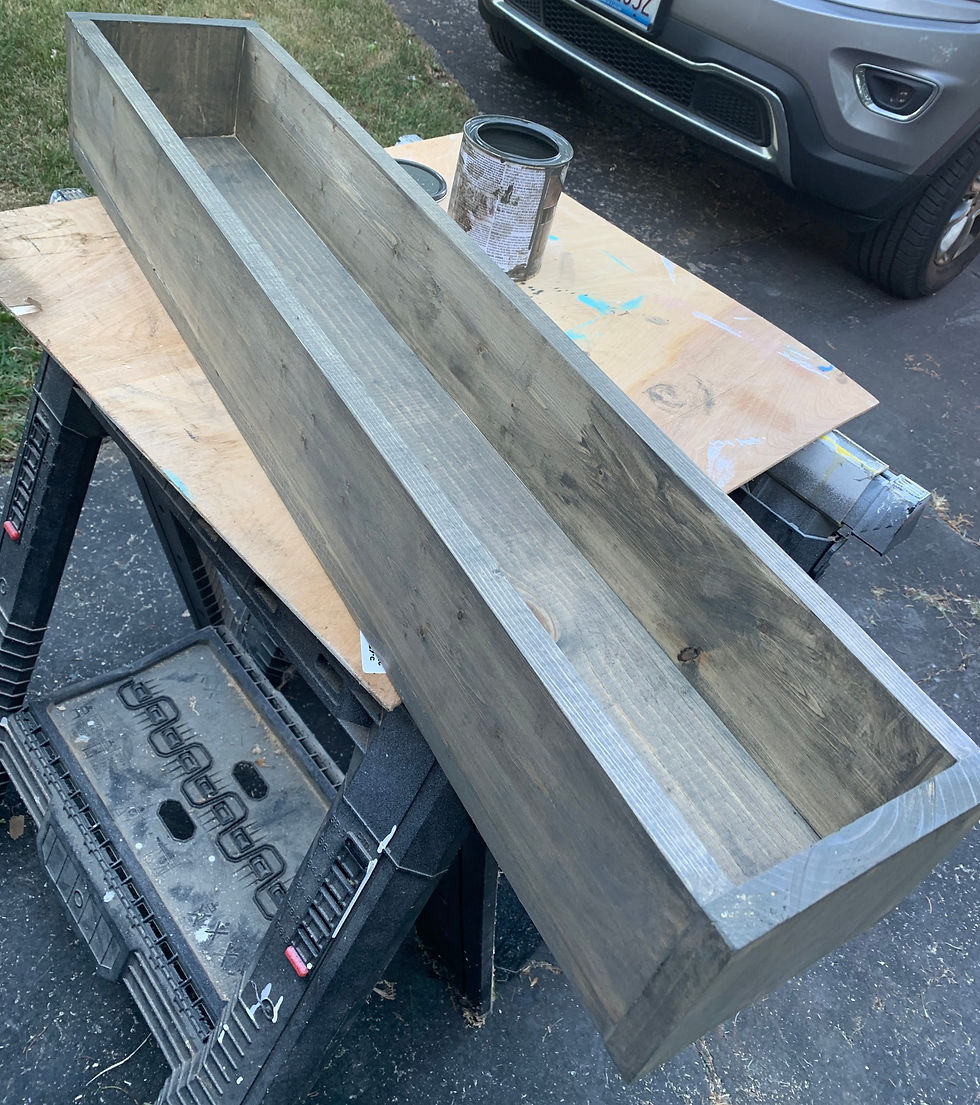
36" Window Planter Box
There's not a lot of explaining here on the how to. Cut the boards to your desired lengths. You'll need two boards the same length for the long sides. And you'll also need two cut to the same length for the short sides. For all the sides, I used 1x3s, For the bottom though I used a 1x6, and cut to the same length as the two long sides.
After all your cuts - it's time to just connect the boards. I kept this pretty simple as well. Lined the edges with a bit of Gorilla Wood Glue and then used my Ryobi Brad Nailer as well just for a bit of extra connections.

Once assembled, I like to take a bit of DAP Plastic Wood and line all the cracks with it. I find that it just creates a really nice finished effect once everything is sanded and stained.
Next up is of course sanding. In this particular case, I turned to my Craftsman Multi-tool, because a friend of mine actually had my Ryobi Sander. So a quick sand, wipe down and then time to stain and seal.
I chose to go with Varathane Aged Barrel. It only required one coat. I was happy with the color at that point. And for sealer, I used Varathane Satin Sealer. And after that - well it was time to put it to use and fill it up.
For display, I chose to hang it with tweed rope hooked onto the curtain rod. There's so many different ways you could choose to display it though.
And I have to share... I already have sprouts! Let's see how this goes. Can't wait until I can actually pick some spinach leaves!

Comments